We have some of these quilts made by my mom and she used flannel, which makes the quilt very soft. Flannel is a good choice because you need to pick fabrics that will ravel and fray. This task is quite easy (if you can sew a right line and have patience) and could make a marvelous baby/child gift if made with Disney Flannel.
No batting is needed if you use flannel because the flannel thickness is adequate to give your rag quilt a
substantial feel. You may use batting to make your quilt thicker, and these instructions will report both with and without batting. You can also use more flannel as a filler if you want to, but this is optional.
Tote Bag Sewing Pattern
There will be two layers for this quilt: top (frayed side) and a bottom. Cut Squares for the top and the lowest the same sizes. 8" to 10" is about right for a large quilt but you can make them larger if you want to simplify or make them smaller if you are up for more information or are development a smaller quilt.
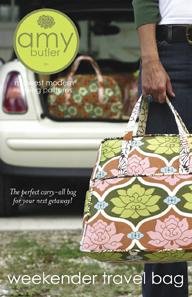
Amy Butler Weekender Travel Tote Bag Sewing Pattern Best
Rate This Product :

![]()
Amy Butler Weekender Travel Tote Bag Sewing Pattern Feature
- Perfect Carry-All bag for a weekend getaway!
- Finishes at 17" wide (bottom) x 14.5" tall x 7.5" deep
- Includes instructions, pattern and measurements
- Metric Conversion Chart inside
- Great for bold retro prints
Amy Butler Weekender Travel Tote Bag Sewing Pattern Overview
The Amy Butler Weekender Bag is a perfect carry-all bag for your next getaway. The finished bag measures 14" wide across top of the bag, 17" wide across bottom, by 14 1/2" tall by 7 1/2" deep.

Customer Reviews
*** Product Information and Prices Stored: Jan 12, 2012 07:47:05
Determine the number of material and squares you will need: If the quilt size you would like is 64", you will need eight 8"squares on a side, times 8 rows or 64 squares. These squares will be 10" by 10" to allow for the ragging, so you will need a total yardage of about 5 sq yards for the front and 5 sq yards for the back. For a baby size quilt (36") you will need about 1 1/2 yards for the front and 1 1/2 yards for the back (assuming 36" fabric width). For a child or baby size quilt you will probably like to use smaller squares. You could use a 9x9 pattern with 4 inch squares (6" cut quadrilateral size) or a 6x6 pattern (with 8" cut quadrilateral size). Experiment with quadrilateral sizes to get the look you like. This is a good opportunity to use Fat quarters for a range of patterns.
Cut 64 squares, each 10" quadrilateral of your top and lowest fabrics. Use a range of flannels combining separate patterns and solids. Lay out the squares (on a floor will do) to see the overall succeed and to conclude how you will want to sew the pattern blocks together.
If you conclude you want to use batting as a filler, cut the squares of batting 2 inches smaller than the top and lowest squares. If your quilt has 10 inch top and lowest squares, you would cut the batting at 8" or less. You will need to quilt the squares before you join them into the quilt. Create a sandwich with your top square, batting and lowest square, then sew an "X" straight through the sandwich before joining them together. You do not need to do this step if you are using flannel. Keep the right sides out (on both the top and bottom).
When development a rag quilt without batting, you can use your same material as your filler if you want the blanket to be heavier. In this case, the filler pieces can be cut the same size Or Smaller as your top and lowest squares, and you should join the 3 pieces of material together to form a block prior to joining all the quilt blocks together. For filling squares you can use any kind of flannel (but if you cut it the same size as the top and lowest squares you will see it when you fray edges). Uncostly flannel from your local fabric store is fine for this purpose. If you do not want to see the filler flannel, make it smaller than the top and lowest (similar to the instructions for the batting above) and stitch it in place using an X, or a stitching pattern of your choice. You don't have to have a filler if you don't want to.
To sew a rag quilt: Use a 1 inch seam reduction so that you have extra fabric on the seams for raveling. A 10" quadrilateral will be an 8" sewn square. We will use as an example a quilt with 10" squares which will be 64" x 64". Adjust for your chosen size squares.
Once your blocks are made, sew blocks together with One Inch seams, 8 sets of squares into a row. You will sew so that the raw edges are toward the front/top face of the squares. All blocks face front so that you can have them showing from the front of the quilt. Make 8 rows of 8 squares each.
Next, sew rows together, matching seams. Sew with raw seams toward front of quilt. Sew the seams open to reduce the bulk of sewing over seams turned to one side.
After you have joined the 8 rows, sew an inch inside the outer border all around the quilt.
Cut the seams: This will take a while. With sharp scissors snip into the one inch seams, being just not to cut the seam. Make a cut every 1/2 inch or so. Cut the outer edge the same way. A spring loaded pair of scissors is a good speculation if you are going to make more than one quilt.
Wash to Fray: Run the quilt straight through a regular cycle of wash and drying. You may have to run it straight through a few times to make the edges soft and frayed.
Make A Rag Quilt - Easy Instructions
No comments:
Post a Comment